Shablon-2
отредактирована 28.03.2023
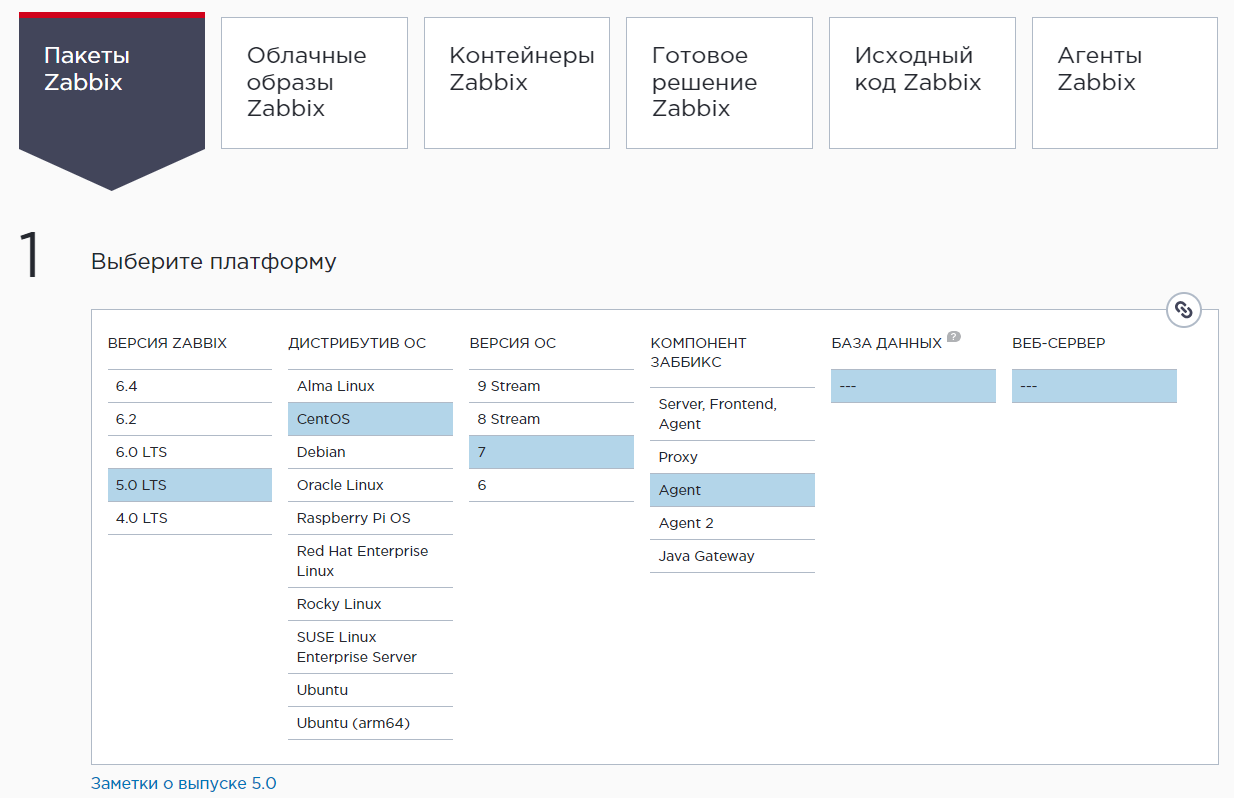
# rpm -Uvh https://repo.zabbix.com/zabbix/5.0/rhel/7/x86_64/zabbix-release-5.0-1.el7.noarch.rpm
# yum clean all
# yum install zabbix-agent
# systemctl start zabbix-agent
# systemctl enable zabbix-agent
# nano /etc/zabbix/zabbix_agentd.conf
ServerActive=127.0.0.1 (замените адрес 127.0.0.1 на адрес своего zabbix-сервера)
Hostname=Zabbix server (прописываем уникальное имя хоста, например доменное имя (в моём примере пропишу PowerDNS), это имя будет добавлено со стороны zabbix-сервера)
# systemctl restart zabbix-agent
# systemctl status firewalld
# systemctl stop firewalld
# systemctl disable firewalld
# systemctl mask --now firewalld
# yum install -y iptables-services
# systemctl start iptables
# systemctl start ip6tables
# systemctl enable iptables
# systemctl enable ip6tables
# systemctl status iptables
# systemctl status ip6tables
# iptables -nvL
# ip6tables -nvL
# iptables -A INPUT -p tcp -s 10.15.41.8 --dport 10050 -j ACCEPT
# service iptables save
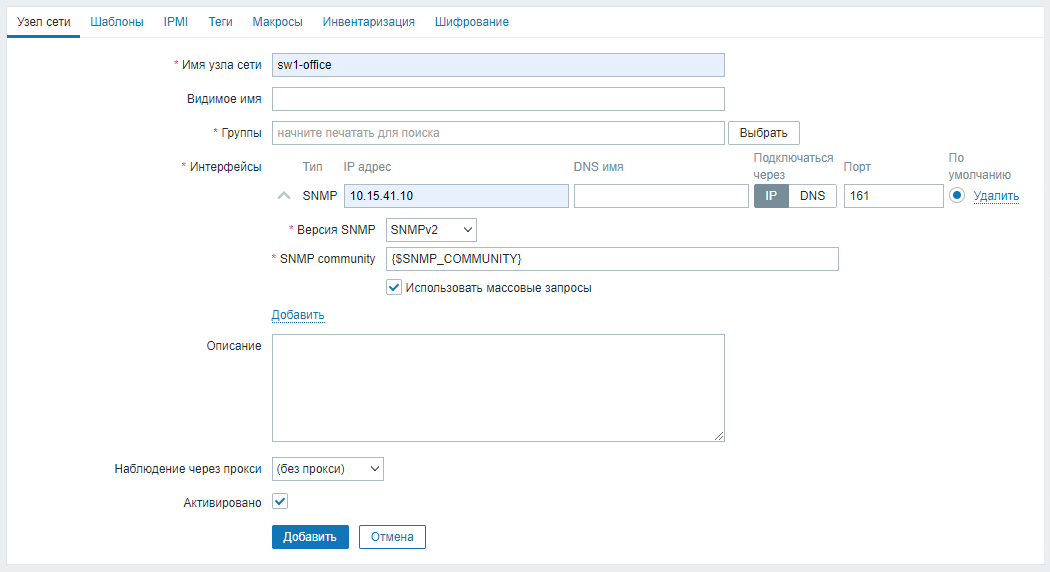
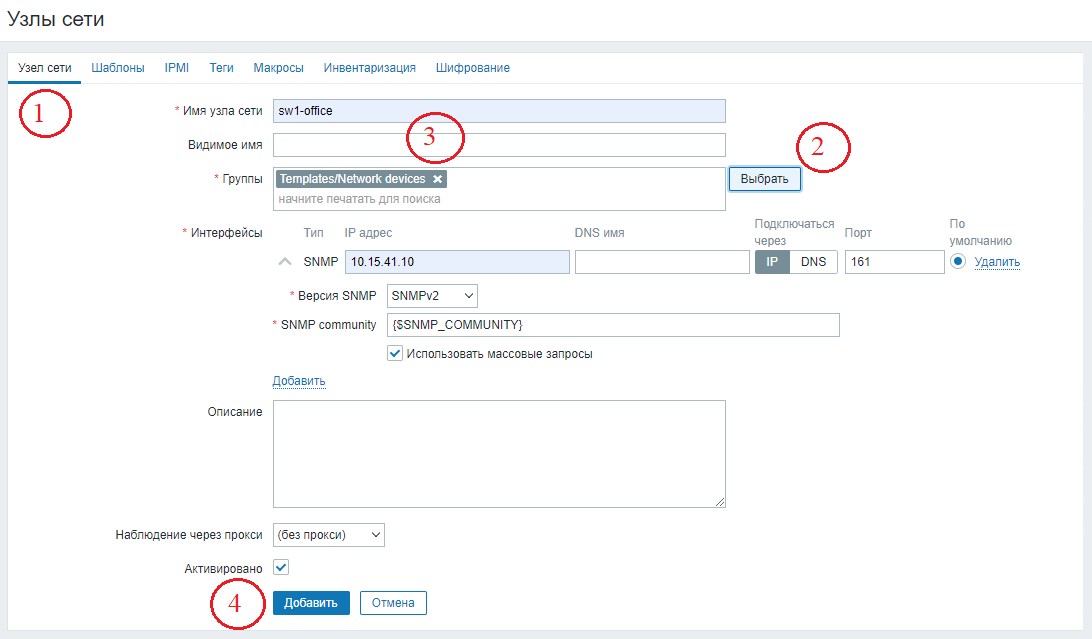
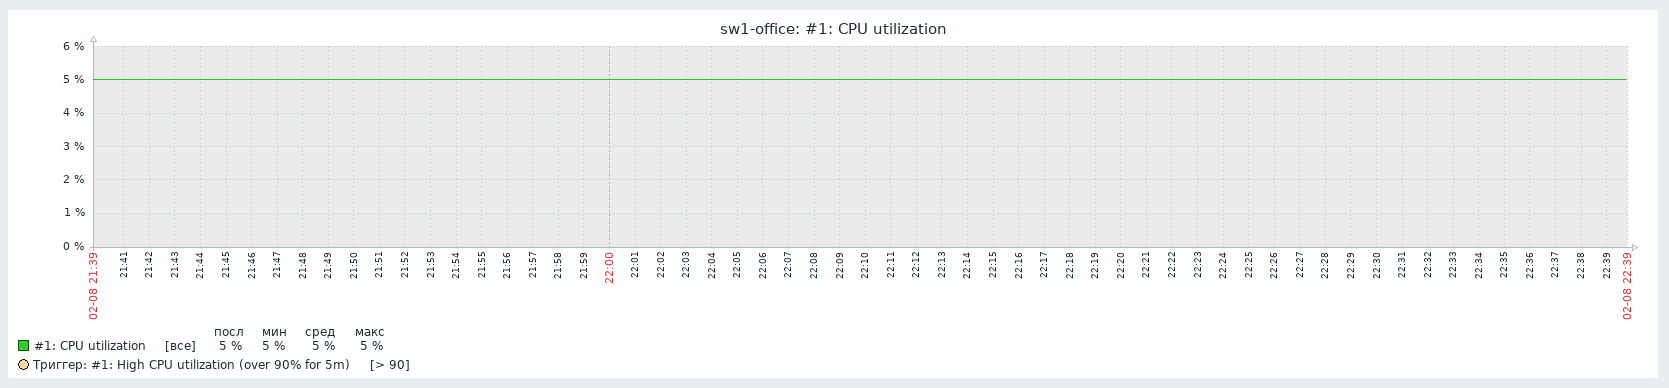
Настройка в zabbix коммутатора Cisco
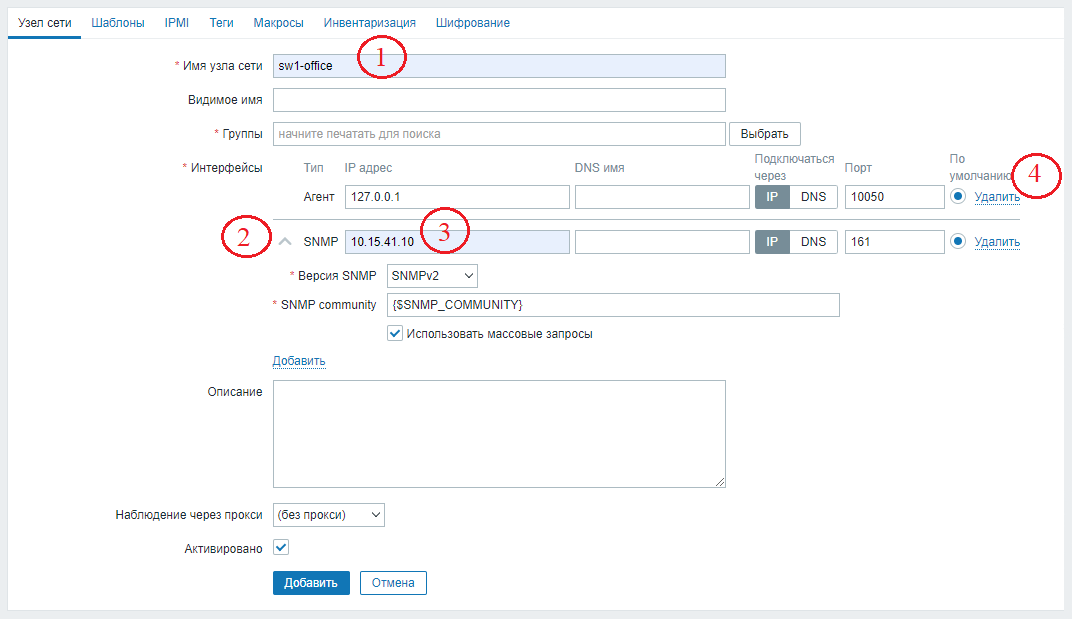
- Добавить Имя узла сети
- Добавить Агента SNMP
- Добавить IP-адрес агента (10.15.41.10)
- Удалить Агента с IP-адресом 127.0.0.1